Presenter Upload help

Simple guides for setting up a conference, collecting presenter files, reviewing submissions and sharing room-ready downloads.

01

Create a new conference

Start with a draft workspace for each event.

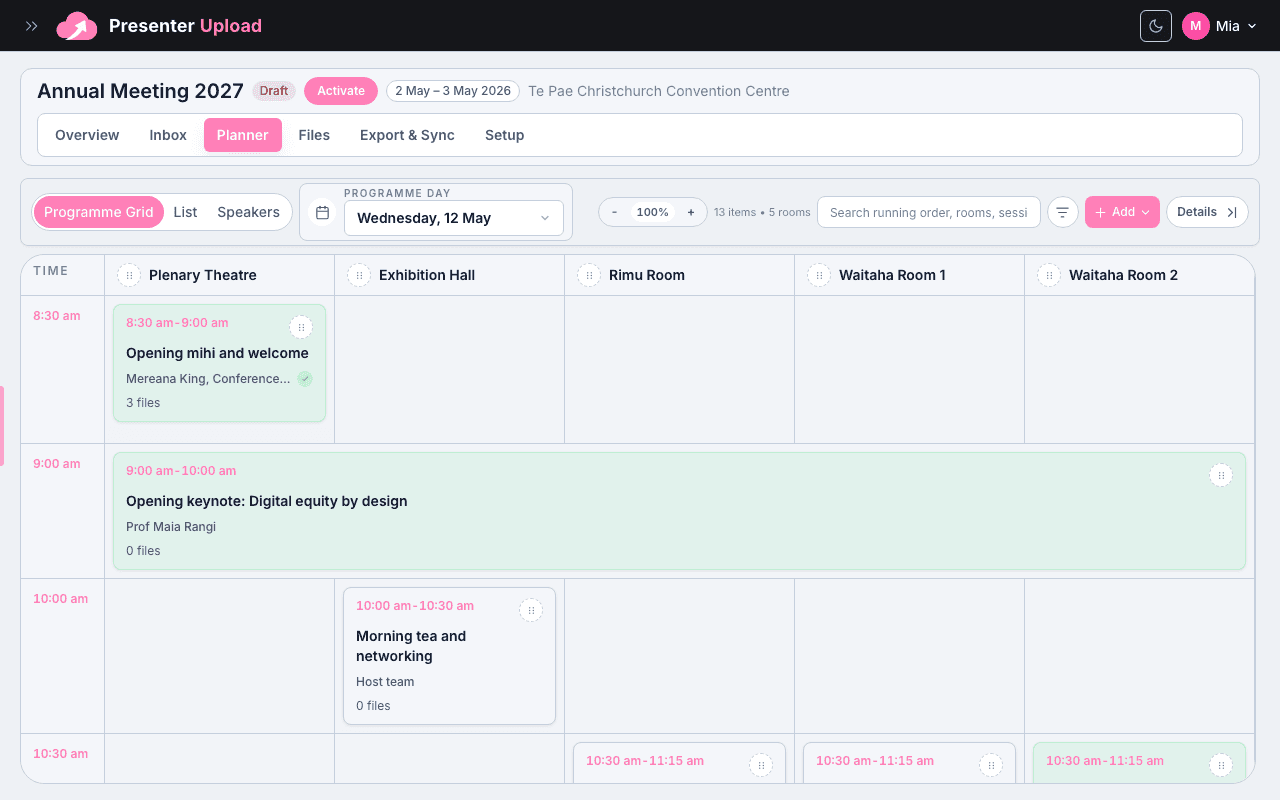
Create one conference workspace for each event. Keep it in draft while you add the details, then activate it when the upload portal and programme are ready.

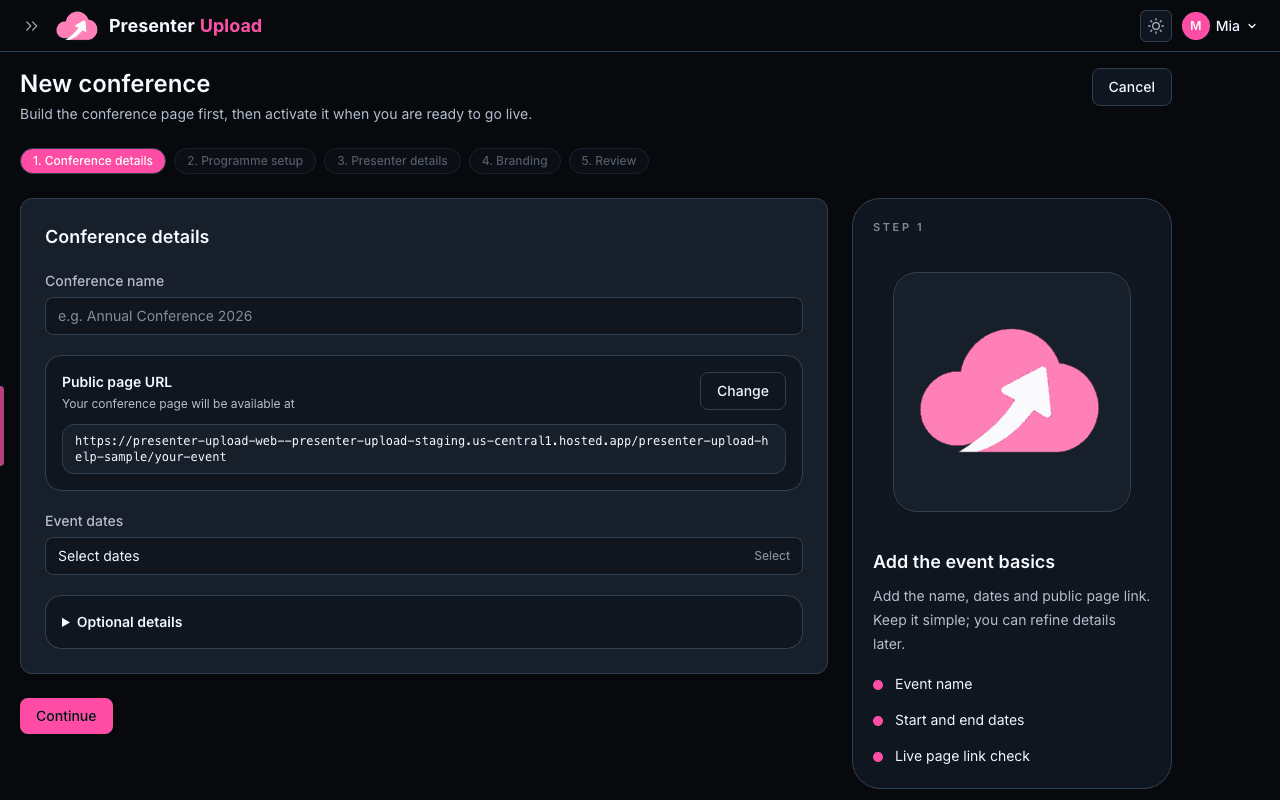
  1. 1Start the conferenceOpen Conferences and choose New conference. Add the event name exactly as presenters and AV teams should see it.
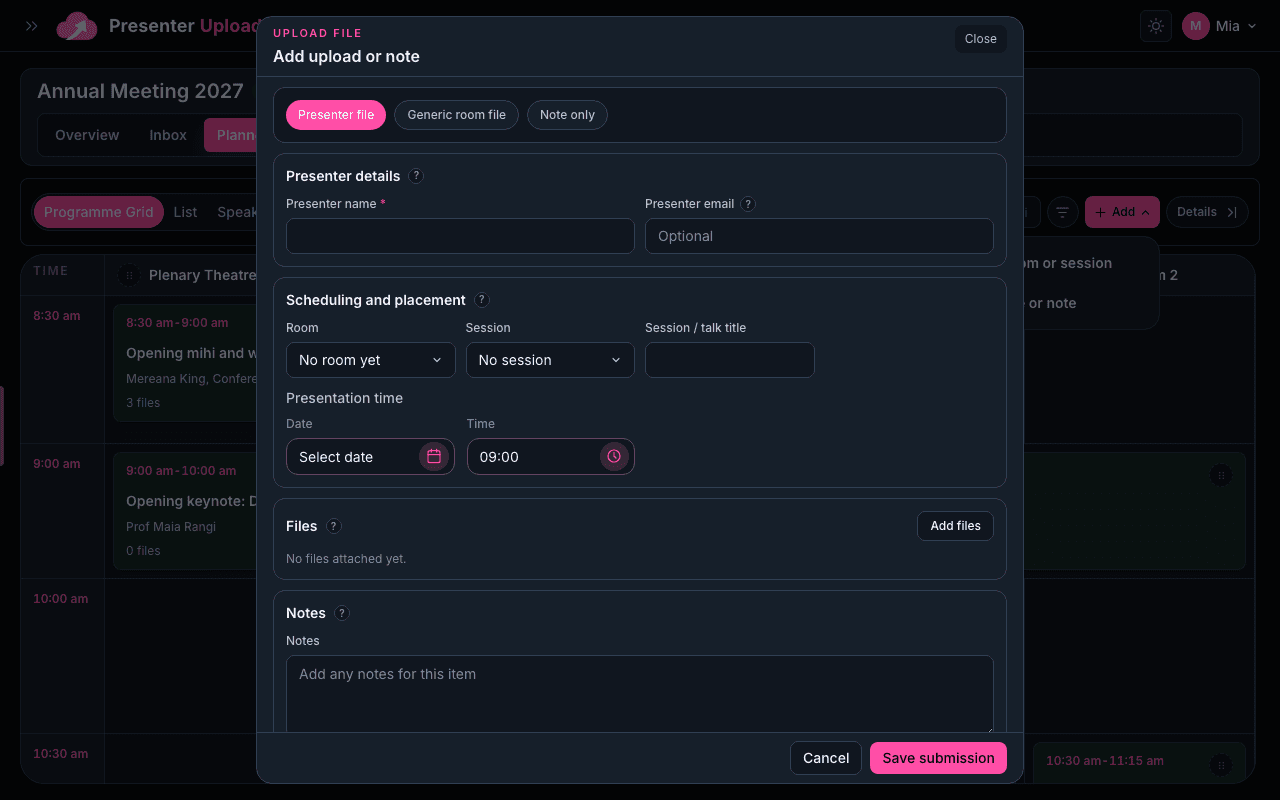
  2. 2Add the core detailsAdd the venue, event dates and timezone. These details help the programme, presenter deadlines and room handover stay consistent.
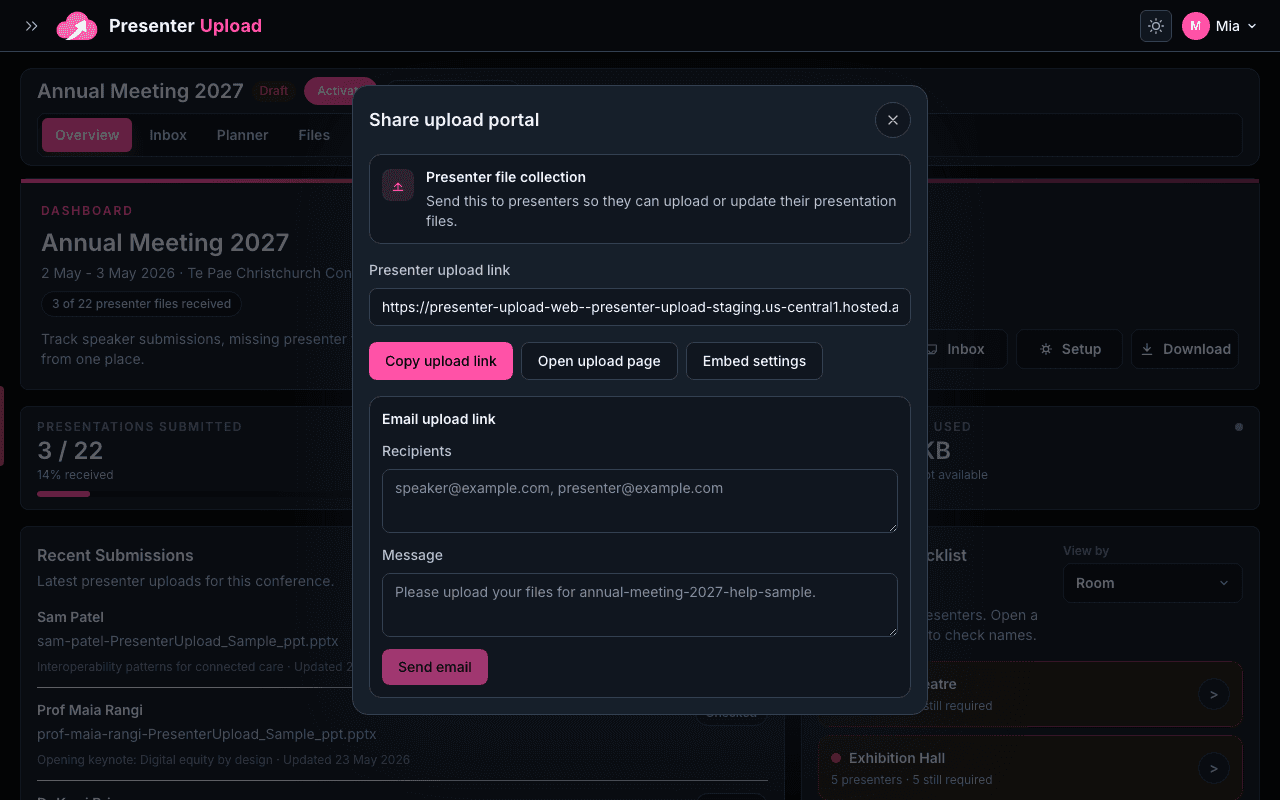
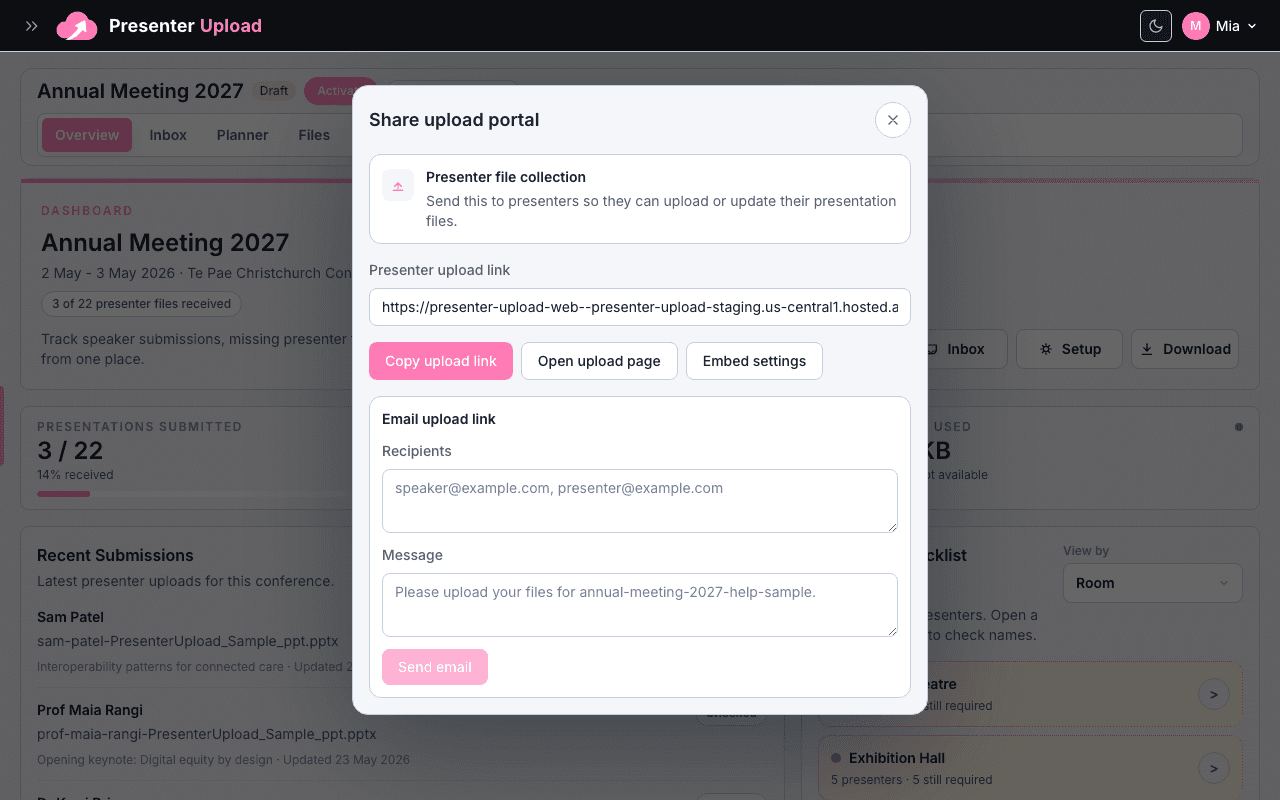
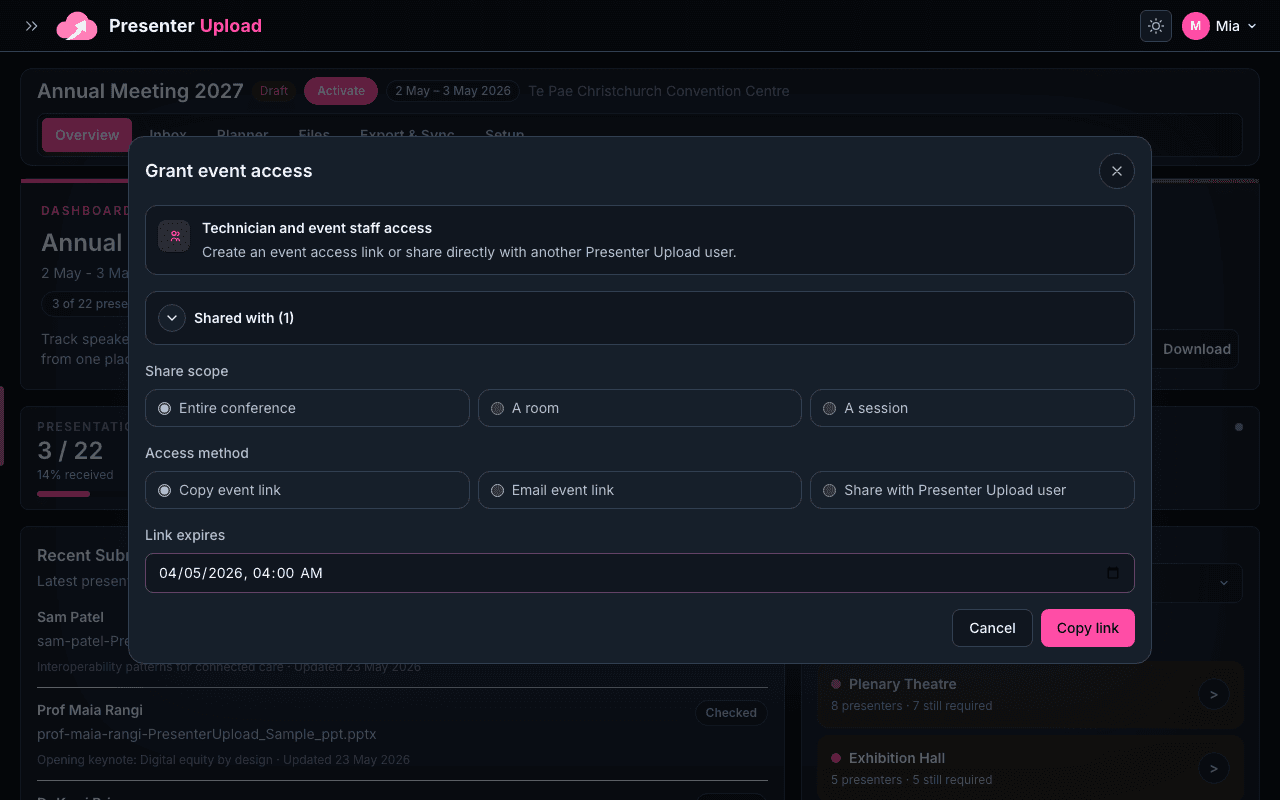
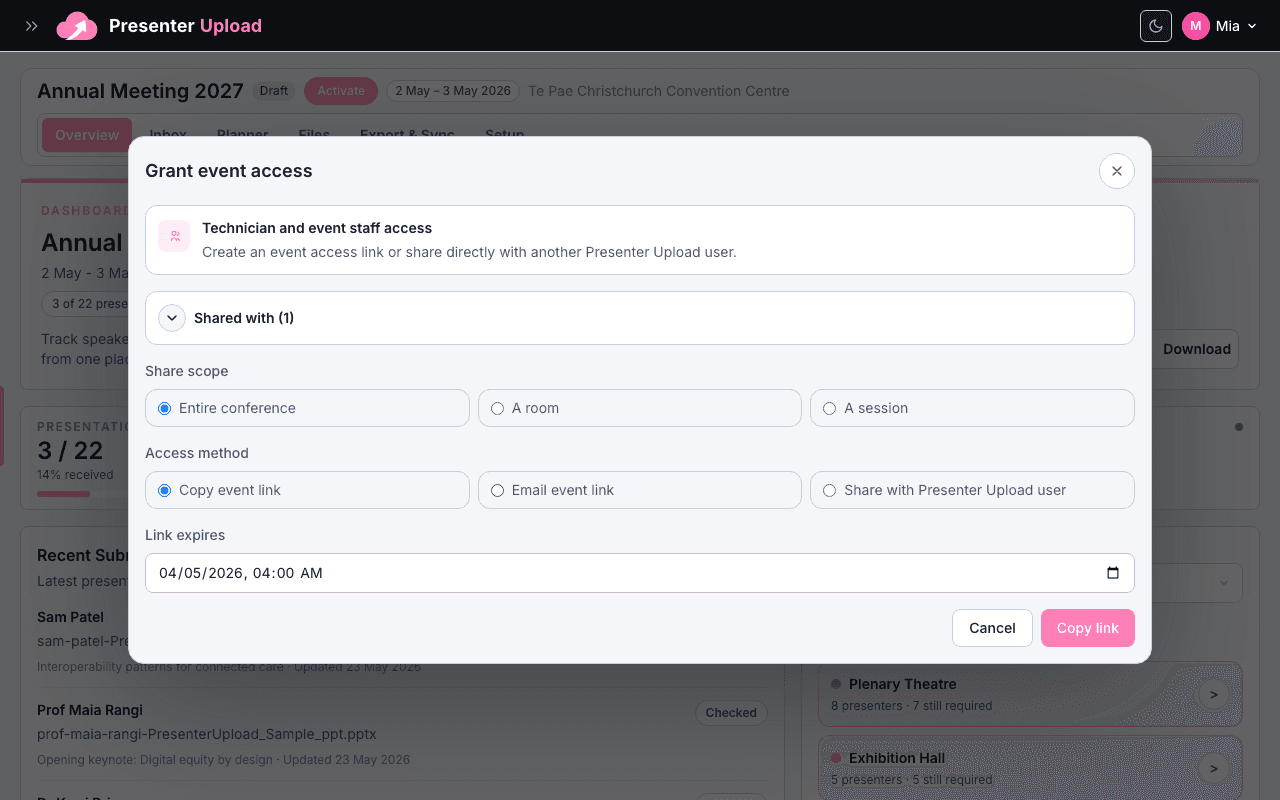
  3. 3Save as draftSave the conference as a draft first. You can return to branding, programme setup and sharing before presenters receive the link.
Back to top
New conference setup screen in Presenter Upload.

02

Change branding

Make the presenter portal feel like the event.

Branding controls live inside conference settings. Use them to make the public upload portal feel like the event while keeping the organiser workspace unchanged.

  1. 1Open BrandingOpen the conference, go to Settings, then choose Branding. Upload the event logo and banner artwork.
  2. 2Adjust the portal lookSet the main colour, page style and presenter instructions. Keep the wording short and focused on file requirements.
  3. 3Preview before sharingUse the preview before sharing the link. Check the logo, banner, colours and instructions in the current light or dark theme.
Back to top
Conference settings branding section with logo, banner, colour controls and portal preview.

03

Add programme details, rooms and sessions

Build the room and session structure before files arrive.

The programme gives Presenter Upload the structure it needs to sort files by room, session, presenter and running order.

  1. 1Add the programmeOpen Planner and import the programme when you have one, or add rooms and sessions manually for a smaller event.
  2. 2Check rooms and sessionsCheck room names, session times and presenter names. Small naming fixes here make the file handover much easier later.
  3. 3Keep it currentKeep the programme updated when sessions move. New submissions and Prep Agent suggestions use this structure.
Back to top
Programme planner organised by rooms and sessions.

04

Manage submissions

Review what arrived and keep every file traceable.

The Inbox is where presenter uploads arrive. Use it to check files, read notes, and confirm whether a submission is ready for the programme.

  1. 1Review new uploadsOpen Inbox to see new, changed and reviewed submissions. Start with anything marked new or needing review.
  2. 2Check the detailsOpen a submission to check presenter details, notes and attached files. Replace or add files if the presenter sends an update.
  3. 3Confirm the matchUse Prep Agent suggestions to match files to the right room, session and presenter, then confirm the match.
Back to top
Inbox showing presenter submissions ready for review.

05

Share the upload portal

Give presenters one clear place to upload files.

The upload portal is the public link presenters use. Share it only after the basic conference details, branding and upload instructions are ready.

  1. 1Open the share modalOpen Sharing or the conference Settings area, then choose the upload portal sharing action.
  2. 2Preview the presenter pagePreview the public portal first. Confirm the name, branding, instructions and upload deadline are correct.
  3. 3Send the linkCopy the presenter link and send it with a simple deadline, file format notes and contact details for support.
Back to top
Share upload portal modal with presenter link and preview options.

06

Share event files with AV teams

Let AV teams download files without entering the organiser workspace.

Event share links are for AV teams, operators or venue staff who need room-ready downloads without entering the organiser workspace.

  1. 1Choose access scopeOpen Sharing and choose event access. Select whether the link should cover the whole event or only specific rooms.
  2. 2Set permissionsCheck download permissions before creating the link. Use room-only links when teams should only see their own spaces.
  3. 3Share with AVCopy the link for AV teams. The event share page groups files by room, session and presenter for quick download.
Back to top
Event share access modal for AV team download links.

07

Add conference files manually

Keep emailed or late files inside the same event structure.

Manual files keep late emails, organiser notes and onsite changes inside the same conference record instead of scattered across inboxes.

  1. 1Open Add file or noteOpen Operations, Files or Inbox and choose Add file or note. Use this for files that arrive outside the upload portal.
  2. 2Add the itemUpload the file or add a note explaining what changed. Keep the note short so operators can scan it quickly.
  3. 3Assign itAssign the item to the right presenter, room or session so it appears in the correct export and event share view.
Back to top
Add file or note modal for manually adding conference files.

08

Export and save conference files

Save the final event files in a structure your team can reuse.

Use exports when the event team needs a final saved pack, a room-by-room handover, or a clean structure to store after the conference.

  1. 1Choose the export scopeOpen Library or Export and Sync. Choose whether you need the full event, a room pack, or a session-specific export.
  2. 2Check export contentsConfirm whether to include notes, replaced files or only the latest approved versions. This keeps the handover tidy.
  3. 3Download or syncDownload the package or sync it to Google Drive. Store the final pack somewhere your team can access after the event.
Back to top
Export wizard for selecting conference file packages.

09

After the conference

Wrap up the event without losing the file record.

The post-conference flow helps you close the event cleanly after all uploads, exports and AV handovers are finished.

  1. 1Export the final packRun the final export before closing the event. This gives you a saved copy of the room-ready files.
  2. 2Review storageReview storage and decide whether old working files can be removed, kept or archived according to your event policy.
  3. 3Archive the conferenceArchive the conference when the team is finished. Archived events remain available without using active event slots.
Back to top
Post-conference closeout wizard for export, storage review and archive.

Need to get started now?

Create the conference first, then add branding and programme details before sharing the upload portal.

Presenter Upload Help | Presenter Upload